
Can you belive it its been six weeks already and its our last day ladies… today we are going to assemble the quilt top and add borders to it.
Wich ever way you choose to assemble the top is by preference whether you work by joining sets of blocks by 2 to 4 to 8 ect. I like to do mine like the following..
I lay my quilt top up on a design wall. I use flannel backed picnic table cloths as my design wall stapled to a large wall in my sewing room. Before I had a special room for sewing, I would tape it up over a window or whatever space I had.
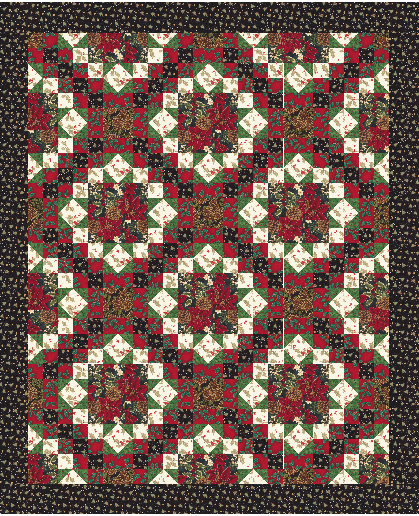
Assembling the Quilt Top:
The layout for the quilt blocks is 5 blocks across and 6 down. The blocks alternate Block #1, Block #2, and so on… Side Blocks (SB) begin and end all rows except for the corners.
Row 1: Corner #1 – SB #2 – SB #1 – SB #2 – Corner #1
Row 2 and 4: SB #2 – Block #1 – Block #2 – Block #1 – SB #2
Row 3 and 5: SB #1 – Block #2 – Block #1 – Block #2 – SB #1
Row 6 Corner #2 – SB #1 – SB #2 – SB #1 – Corner #2
I like to sew each rows in to 2’s horizontally until I have all them paired up. In this quilt that will leave one edge that has one block left over. Sew that one to its adjoining set of 2.
At this point I like to sew the horizontal rows together in this manner as it reduses bulk in to work with.
Sew Row 1 – Row 2 and add row 3
Sew row 4- row 5 and add row 6
Sew the 2 pieces together with row 3 & row 4 together.

Borders:
Cutting Borders:
Please check to make sure that your quilt measures 60 1/2″ x 48 1/2″, you may need to adjust the length of your strips for the borders.
From Fabric #1 cut six 4 1/2″ strips by WOF. Sew these strips into a continuous long piece.
For sides fold the strips right sides together from edges…. measure 60 1/2″ and cut to make your side borders.

For top and Bottom strips do the same as previous step but measure 56 1/2″ and cut.


Sew your side strips to the sides of the quilt then sew on the top and bottom.

We have now completed the entire quilt top. I look forward to seeing all your finished projects so be sure to post them once you have finished. This was fun ladies and I hope to do one of these sew along again. Thanks for participating with me.
Schedule to completion.
click on link to get to parts
Oct 12 Fabric requirements
Oct 26 Part 1 Cut entire quilt
Nov 2 Part 2 Sew block 1
Nov 9 Part 3 Sew block 2
Nov 16 Part 4 Sew side and corner block 1
Nov 23 Part 5 Sew side and corner block 2
Nov 30 Part 6 Sew quilt top and borders
Renee Chester

©2016
