
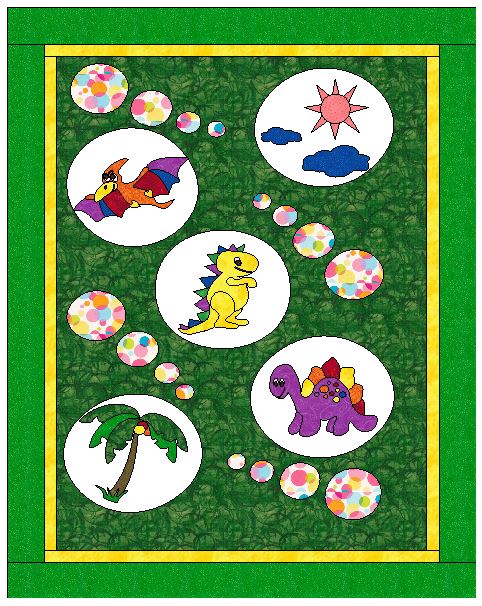
The last post I talked about the guild challenge that I was given.. FQ (dino fabric), Shape (circle), Color (green) make a child size quilt.
I designed the quilt on my EQ8 Program.. I’m not totally sure if I like the different set up I’m so used to the EQ7 that its taking a while to learn where everything is. Anyways this is the quilt that I designed. Last post I showed you all the apliqued blocs not yet sewn down.. This morning I finished sewing them all down. I used a Satin Stitch for the main sections of the dinosaurs I has my machine set at a width of 3 and for the eyes and small inner features I set the stitch width of 2.
Tip for aplique is that you put a stabilizer behind where the applique is going to be sewn… I use parchment paper that can be purchased at butcher or grocery stores. One side of it has a shiny side and that’s the side that will get ironed on the wrong side of the block. Once everything is sewn down the paper will get ripped off.
 I learned this the hard way by having a aplique border wave and bunch when Idid the satin stitch.. that project is now in my UFO pile and has been there for over 5 years now. I’ll dig it up and show you what I mean.
Heres the blocks all stiched down.


An other Tip when stitching down is when your going around a tight curve to adjust your fabric leave the needle down where when you shift the fabric and start sewing again it will over lap. so on an inward curve stop the needle inside on the fabric and on outside curves stop the needle on the outside the background fabric. Lift your pressure foot up and pivot the fabric continue… the more times you do this on a tight curve the smoother your curve will look.
Once I had all by blocks sewn i used a my Creative Grids Circle Savvy Ruler. to cut all the circle shapes.
I folded the appliqued into 4 and cut the size that was larger than all the aplique edges. I also took the given Fat Quarter and cut as many different size circles that it would allow. Then I placed the background Green(part of my Challenge) on the design wall and pinned the circle shapes onto the top till I was happy with a layout.. This is my chosen layout. 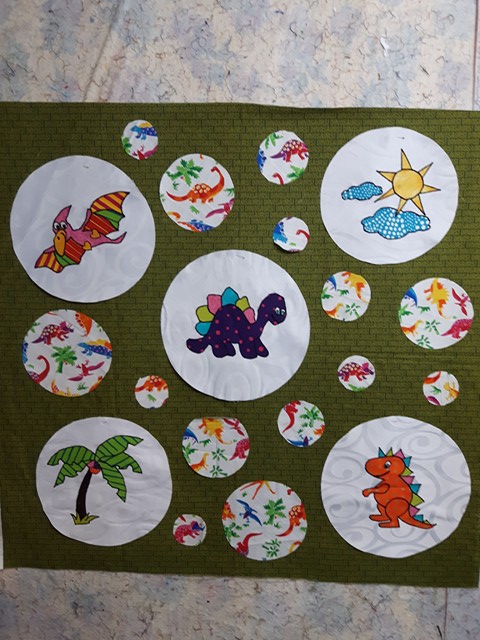
I’m going to challenge my self by learning how to do Inset Circles to sew the circles into place… This will be my next blog… as I learn I will take pictures of how this is done and show you all. by the time I get to the last one i should be a pro at it.
Till next time… Take care.
