
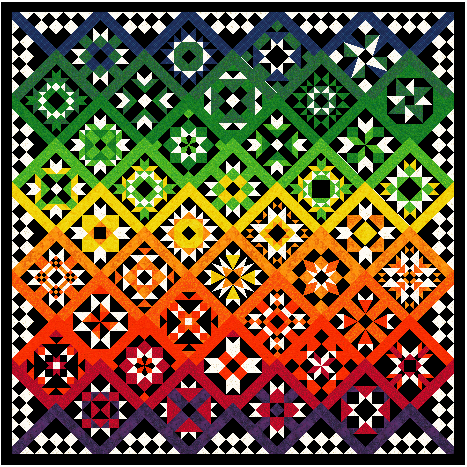
I’m making myself a sampler it’s going to be a King size one. 107″x 107″.
What prompted me to do this was the Canadian Quilters 52 week challenge made from 6″ blocks.. So I decided to use more complex blocks with black background and white star points in each block.. I also wanted the colors to wash from one to the next through the blocks and sashings. I’m going to call it VS (Variegated Sampler) as I can’t come up with a better name for it.
This is not a project for a beginner.
I have no time line for this to be finished other than I do promise that it will be done by March 2020 as I want to display it in our local quilt show.
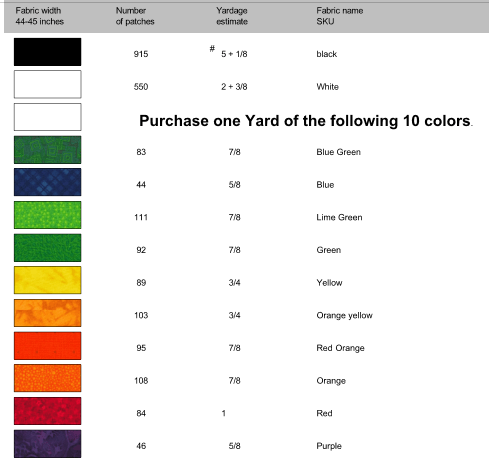
Fabric requirements for this quilt are found here: VS Fabric requirements
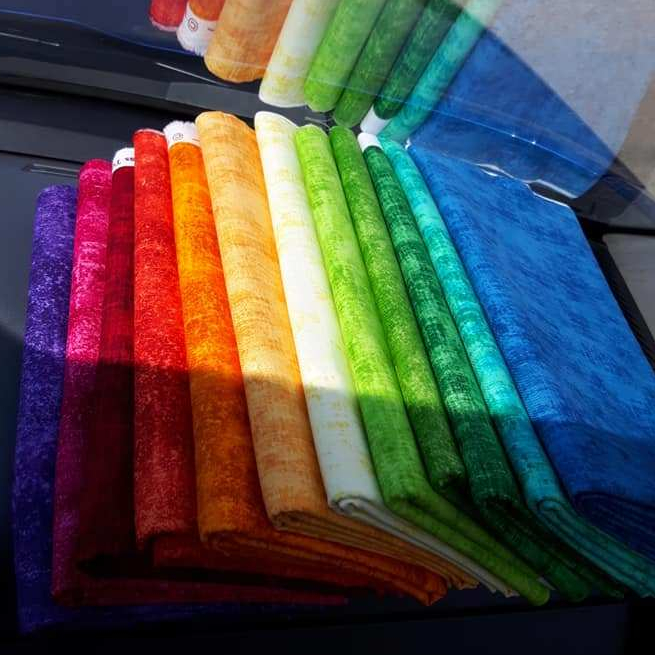
I rounded up to one meter of each fabric so that incase I made mistakes I’d have enough. I was lucky enough to find fabrics for this project at Stitches and Dreams in Drayton Valley Ab. She is trying to lessen her stock for inventory so it was 40% off. Here’s my selection.
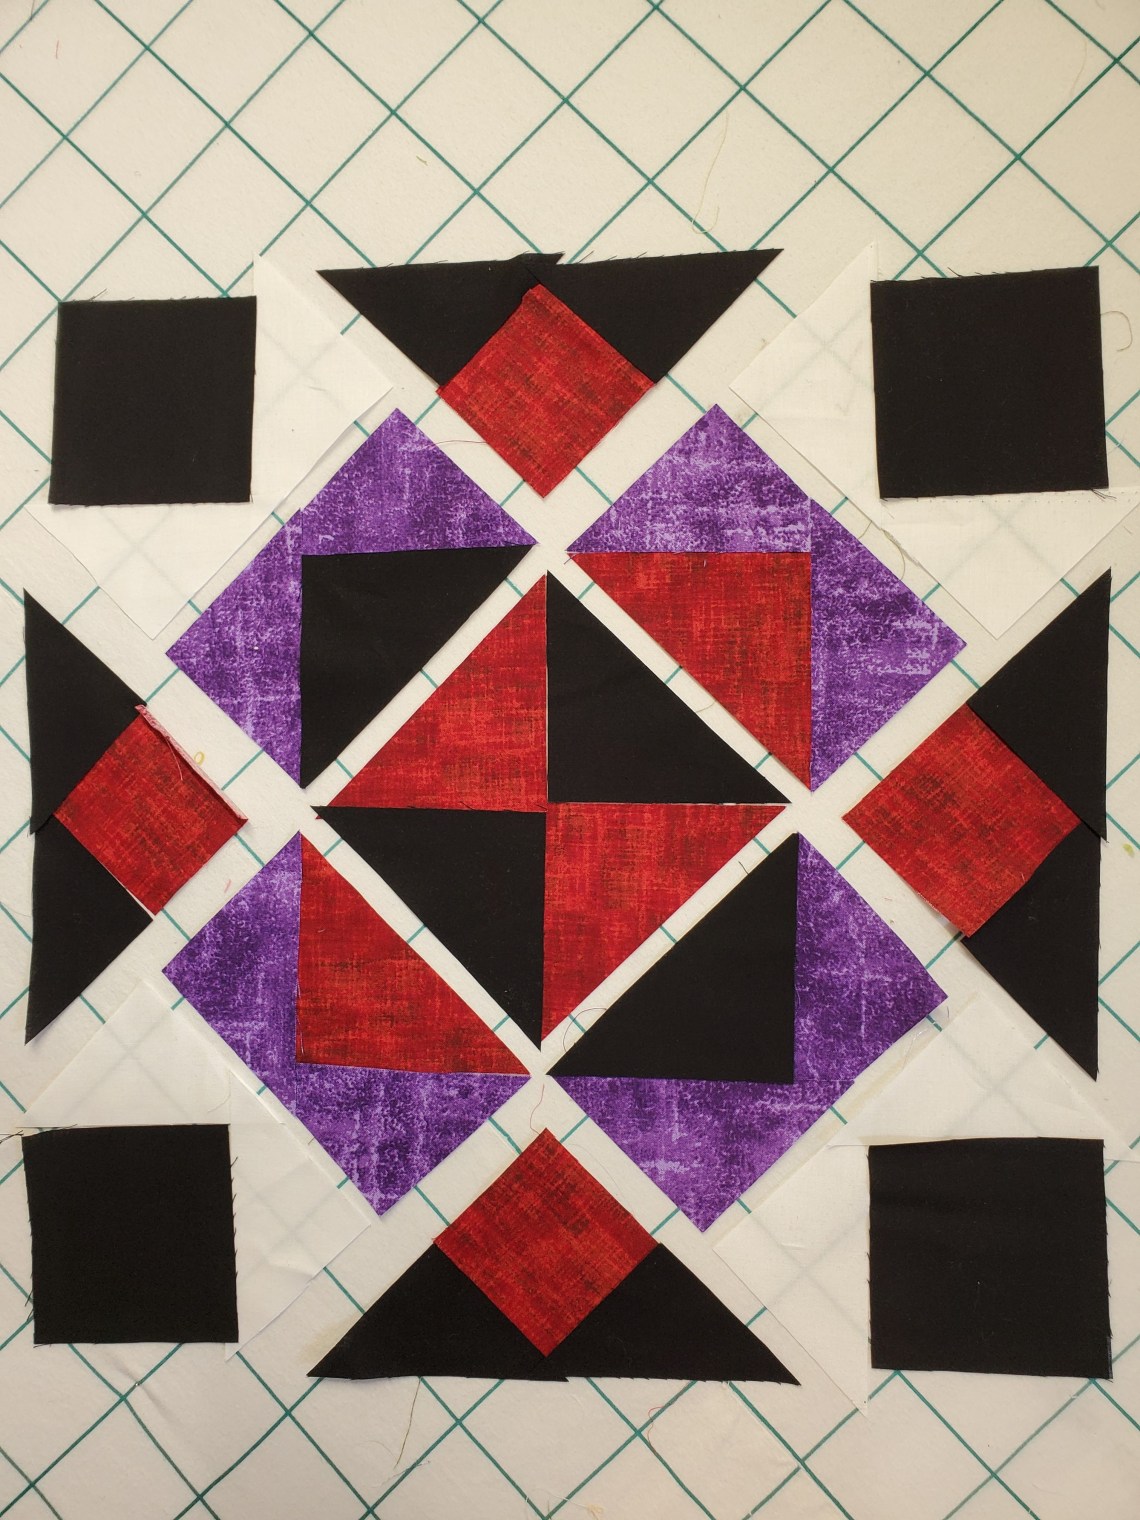
Block 1.

Photo tutorial of how i made this block. I broke it down into sections as I built the block. I recommend that you layout the pieces on a design area I use my design wall.
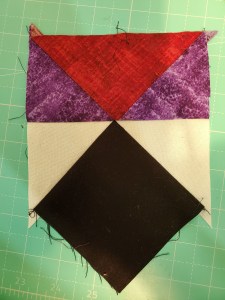
Center section. right sides together line up the corners and sew then sew the 2 pieces together.Return to design wall.


*use accurate 1/4″ seam on all seams for the whole project
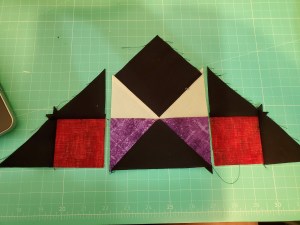
Flying geese. line up the corners place right sides together and press towards the goose. place the other wing and do the same. Trim to 5″ x 2 5/8″ to return to design wall when complete.


Side triangles. line up the corners RST and press to the dark and do the same with the other triangle. return to wall when complete.


Outer Corners. find the center of the patches and line the crease and sew do the same for the other side. trim the square part of the block so it is 1/4″ from the point and 5 inches wide. i lined up a mark on my ruler with the points of the square.


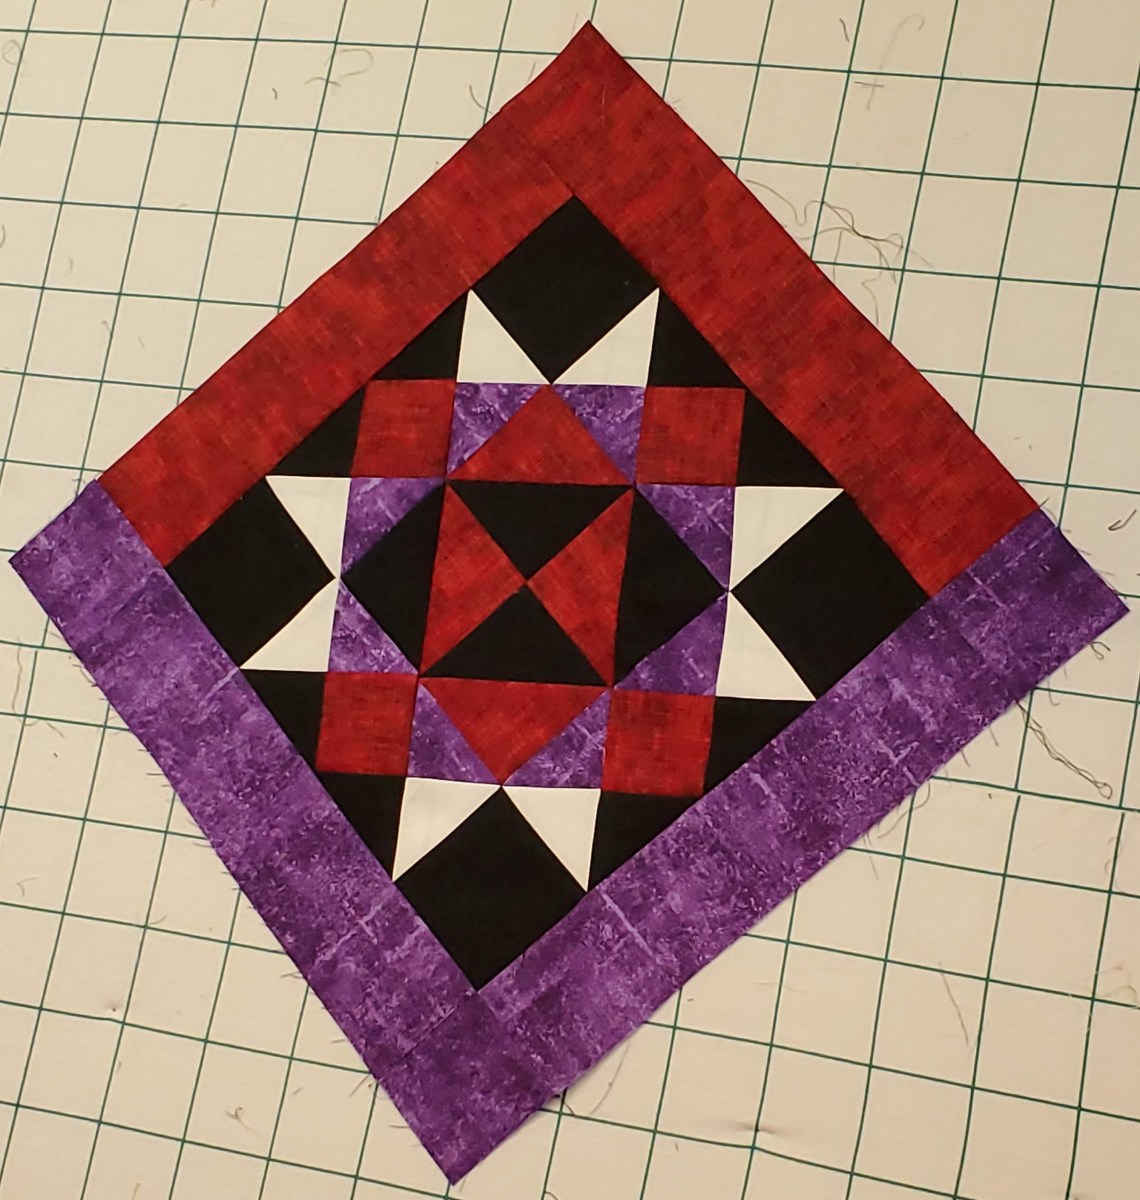
Sew the sections together.. line up the points using a pin. also nest all the seams when you are able to.


I’ve added the sashings as i go. Measurements for the sashings is 12.5″ x 3″ and cornerstones are 3″x3″ refer back to the quilt diagram for the color placements.

I went into the Drayton valley Quilt shop and she had Moda concrete..rock solid and timeless treasures patt#Studio-c on sale at 40 percent off.
LikeLike
That a pretty nice looking first block. I’m watching along.
LikeLike
feel free to save the patterns.
LikeLike
As a Newbie, I am permanently searching online for articles that can be of assistance to me. Thank you
LikeLike
This is a gorgeous sampler. It is now on my bucket list. I have a question, how did you decided on the construction of these blocks? Was it dictated by the cutting instructions? Is the PDF for the cutting what comes out of the EQ program? I’m curious because I don’t have EQ and as I looked at the picture of the completed block (before I read through your tutorial) I was imagining that parts of it would have been done differently.
It is going to take me a while to collect the fabric and do the blocks, but I’m in love with all of the different blocks you’ve chosen. Not the same old, same old.
LikeLike
Yes the pdf were done with my EQ 8 program it dictates what the measurements are as you see in the pattern pdf.
LikeLike